Màn hình LED đang trở thành giải pháp hiển thị hiện đại, được ứng dụng rộng rãi trong nhiều lĩnh vực như quảng cáo, tổ chức sự kiện, giáo dục và trình chiếu thông tin. Tuy nhiên, để đảm bảo chất lượng hiển thị sắc nét, vận hành ổn định và kéo dài tuổi thọ, việc lắp đặt cần tuân theo đúng quy trình kỹ thuật. Trong bài viết này, LED SUN sẽ chia sẻ và hướng dẫn thi công lắp đặt màn hình LED chi tiết, giúp bạn hiểu rõ từng bước từ khâu chuẩn bị, lắp đặt đến cài đặt phần mềm điều khiển, đảm bảo hệ thống hoạt động hiệu quả và bền bỉ theo thời gian.
Giới Thiệu Về Màn Hình LED
LED Screen hoạt động dựa trên công nghệ diode phát quang, mang đến chất lượng hình ảnh sắc nét và màu sắc sống động. Có hai loại chính:
- Indoor LED screens: Độ phân giải cao, phù hợp với không gian kín.
- Outdoor LED screens: Độ sáng cao, có khả năng chống chịu điều kiện thời tiết khắc nghiệt.
Việc lựa chọn loại màn hình LED phù hợp với nhu cầu sử dụng là một trong những bước quan trọng trong thi công lắp đặt màn hình LED, giúp tối ưu hiệu quả trình chiếu và độ bền của sản phẩm.
Các Bước Chuẩn Bị Trước Khi Thi Công Lắp Đặt Màn Hình LED
- Site survey: Determine viewing distance, lighting conditions, and the structural characteristics of the installation area.
- Select the appropriate LED display type: Choose based on usage requirements, display size, and environmental conditions.
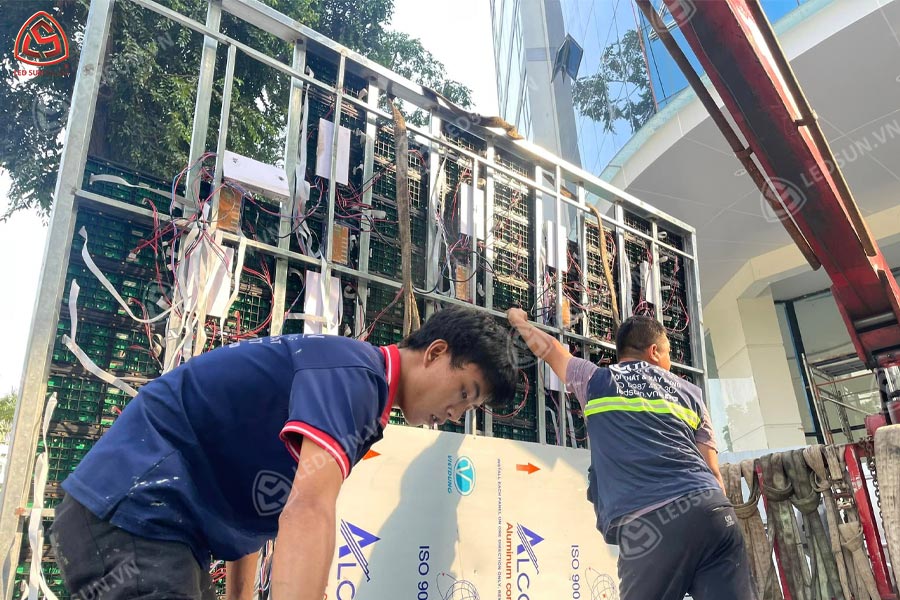
- Prepare materials and equipment: Including mounting structures, power supply systems, signal cables, and necessary installation tools.
- Evaluate installation conditions: For outdoor LED displays, weather-related factors should be assessed to ensure long-term durability and performance.
- Create an installation plan: Ensure smooth installation and minimize technical errors.
Hướng Dẫn Thi Công Lắp Đặt Màn Hình LED Trong Nhà (Indoor)
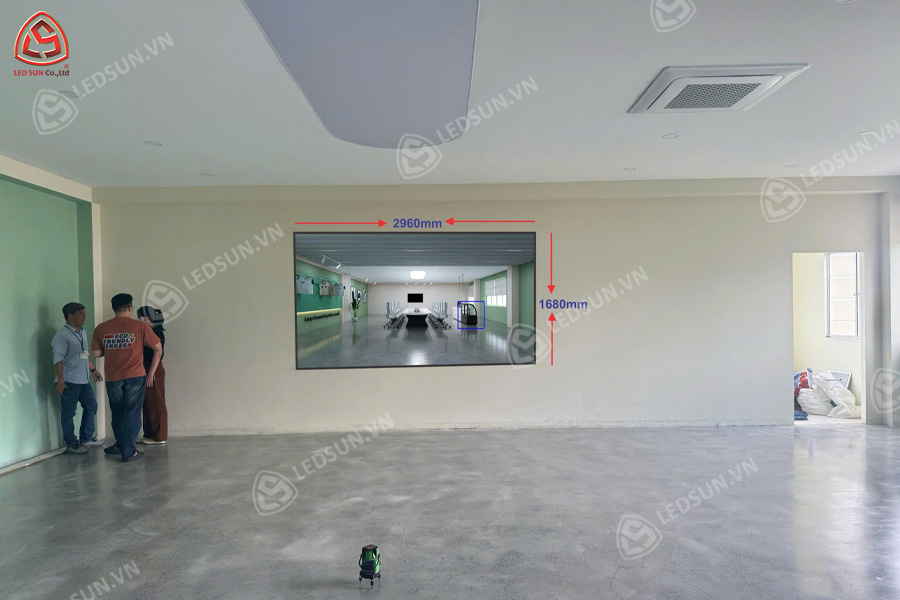
Step 1: Select the Installation Location
- Ensure the display is positioned in an area with clear visibility for viewers
- Minimize direct exposure to strong light sources to maintain stable display quality
- Check wall structures or mounting supports to ensure adequate load-bearing capacity
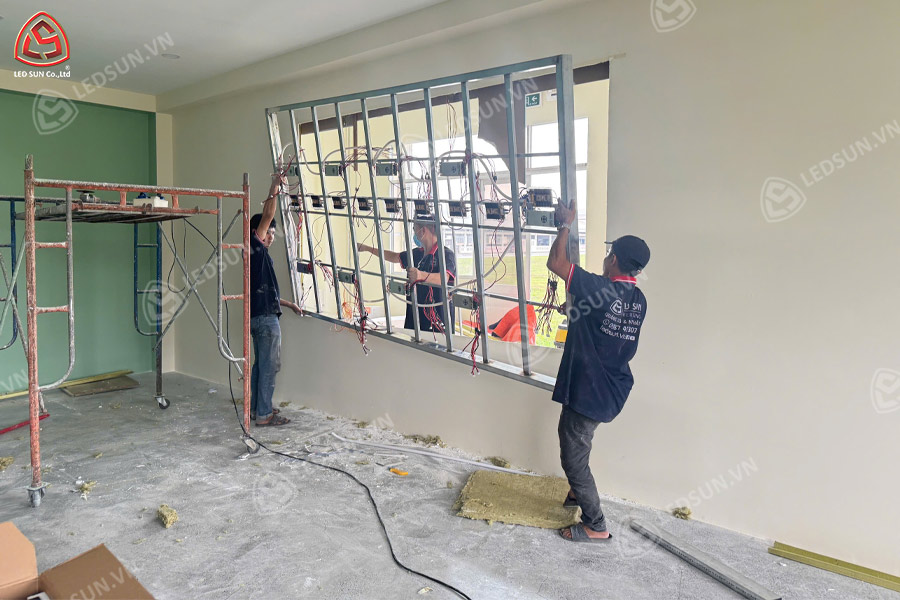
Step 2: Install the Mounting Structure
- The mounting frame must be securely fixed to ensure safety and stability
- Adjust and level the frame carefully to avoid display misalignment or viewing angle issues
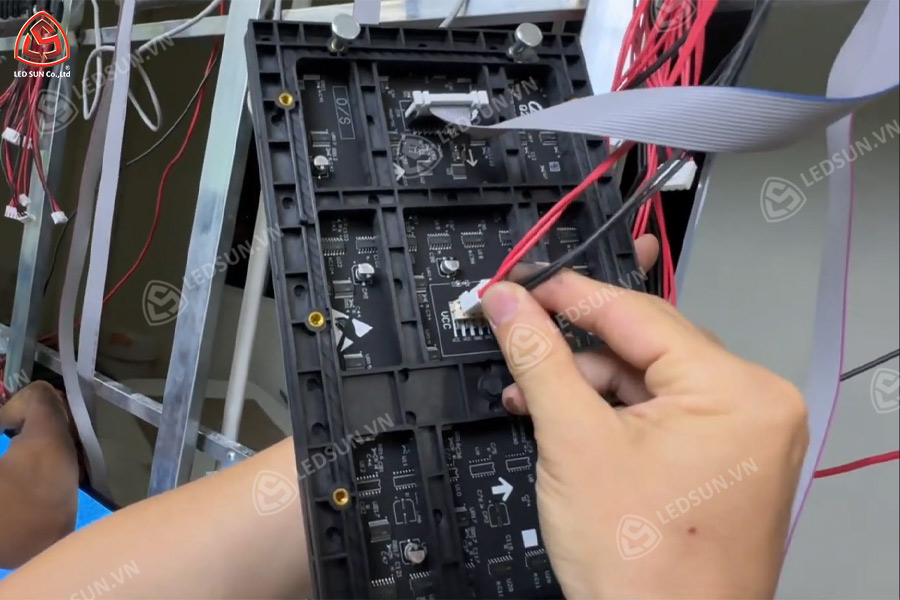
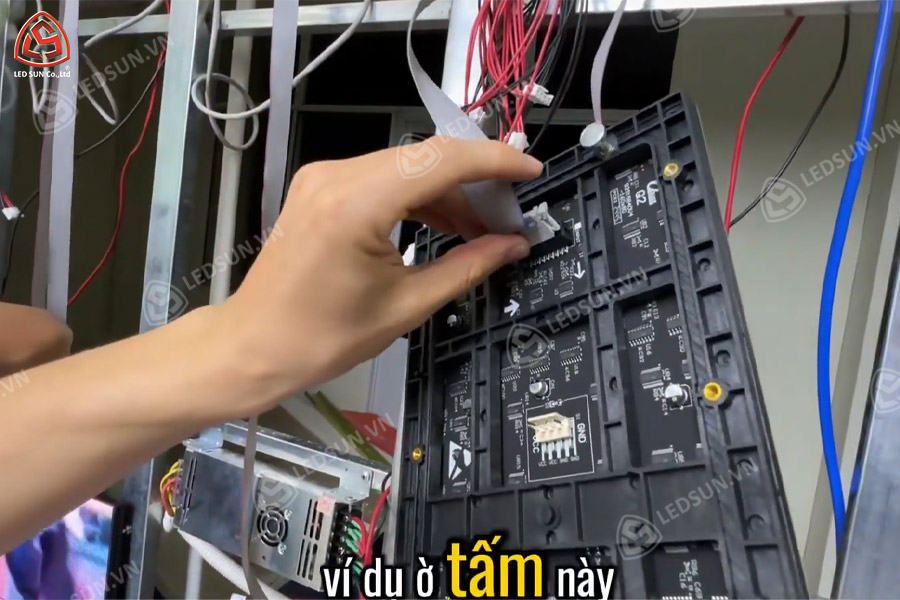
Step 3: Connect Power and Signal Systems
- Use high-quality cables to ensure stable signal transmission
- Ensure the power supply includes voltage stabilization to protect the LED display and extend its lifespan
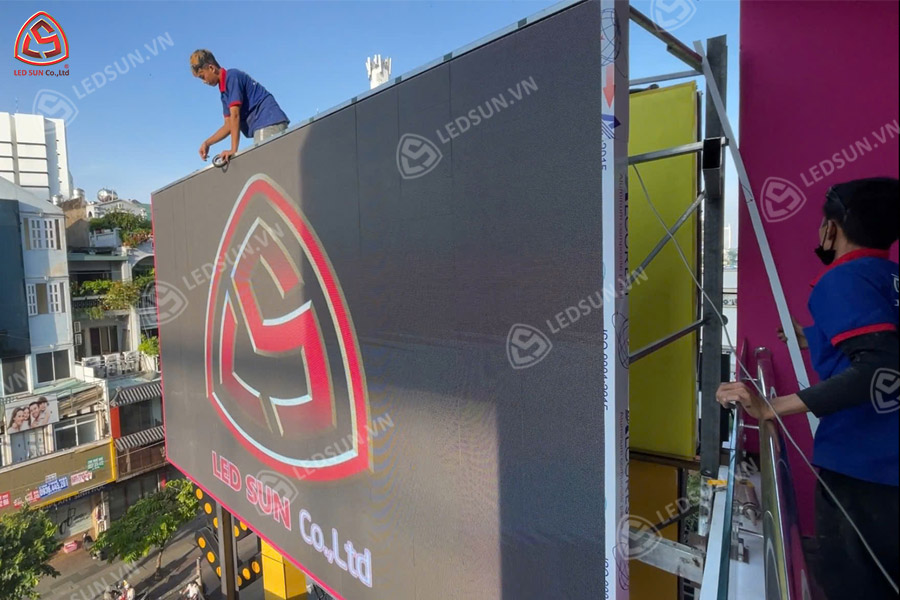
Step 4: Testing and Final Setup
- Inspect all electrical and signal connections, adjust brightness and color settings according to the environment
- Perform system testing to ensure stable and reliable operation before handover
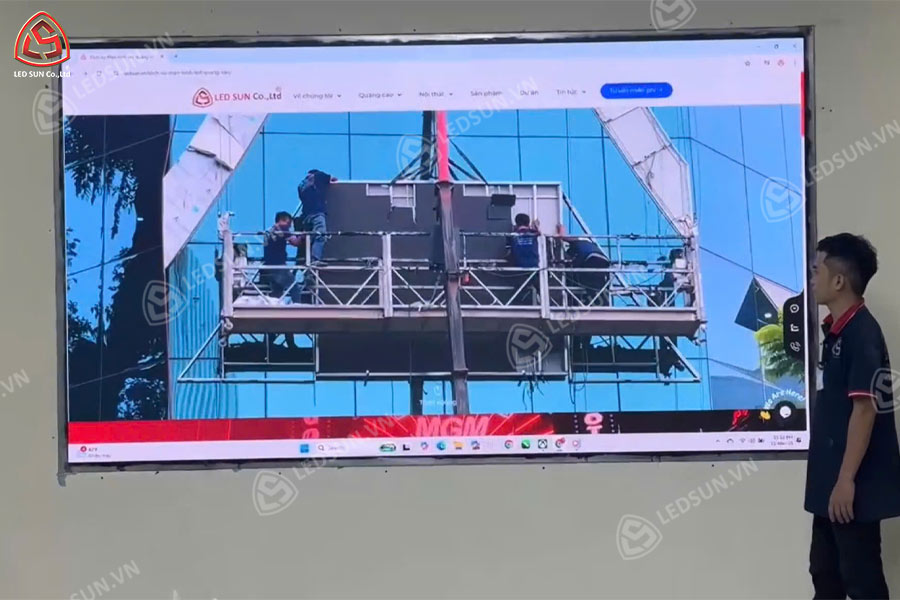
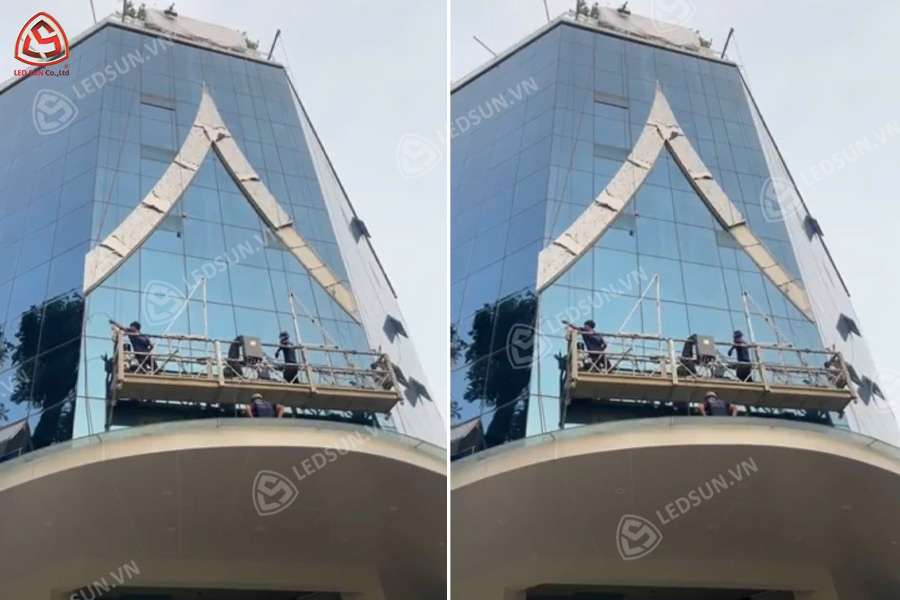
Hướng Dẫn Thi Công Lắp Đặt Màn Hình LED Ngoài Trời (Outdoor)
Step 1: Select the Installation Location
- Choose a location with good visibility and viewing angles, minimize direct sunlight exposure
- Ensure the installation area has a strong structural foundation capable of withstanding wind loads and heavy weather conditions
Step 2: Design and Install the Mounting Structure
- Use anti-corrosion materials to improve long-term durability
- Ensure the structural frame is securely fixed and designed according to load-bearing requirements and safety standards
Step 3: Establish Safe Power and Signal Connections
- The electrical system should include waterproof and short-circuit protection measures
- Use connection components with IP65 or higher protection ratings to resist dust and water exposure
- Verify signal input systems and ensure stable data transmission throughout operation
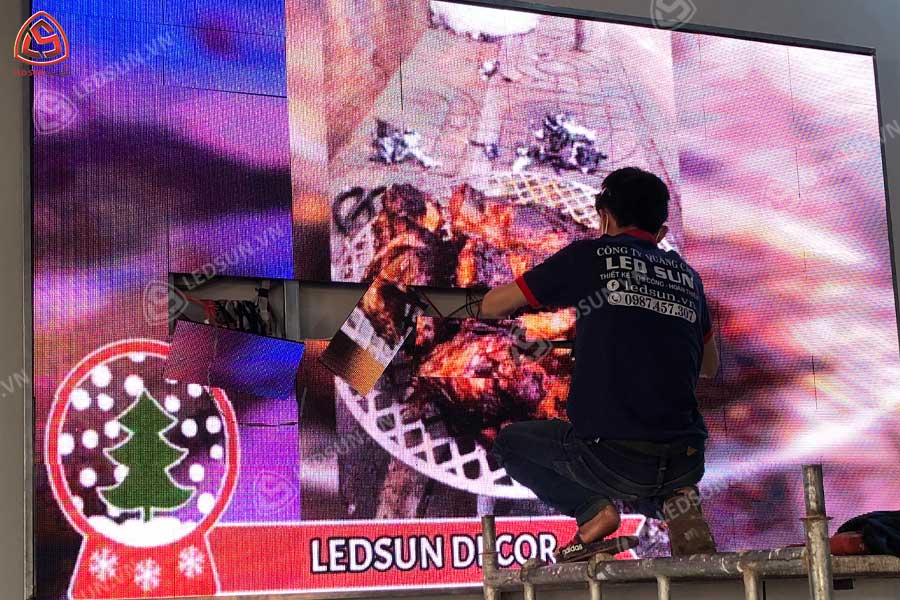
Step 4: Inspection and Periodic Maintenance
- Conduct routine inspections to maintain stable system performance
- Clean the LED display regularly to preserve image quality
- Ensure the cooling and ventilation systems operate effectively to prevent overheating
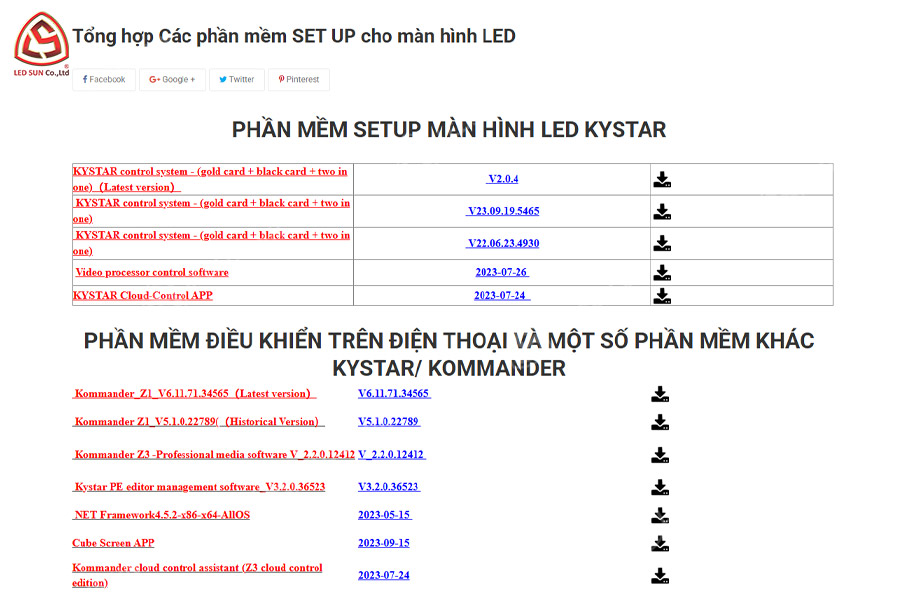
LED Display Control Software Setup Guide
Step 1: Download and Install the Software
- Select a control software compatible with the LED display system being used
- Install the software on a computer or the central control device
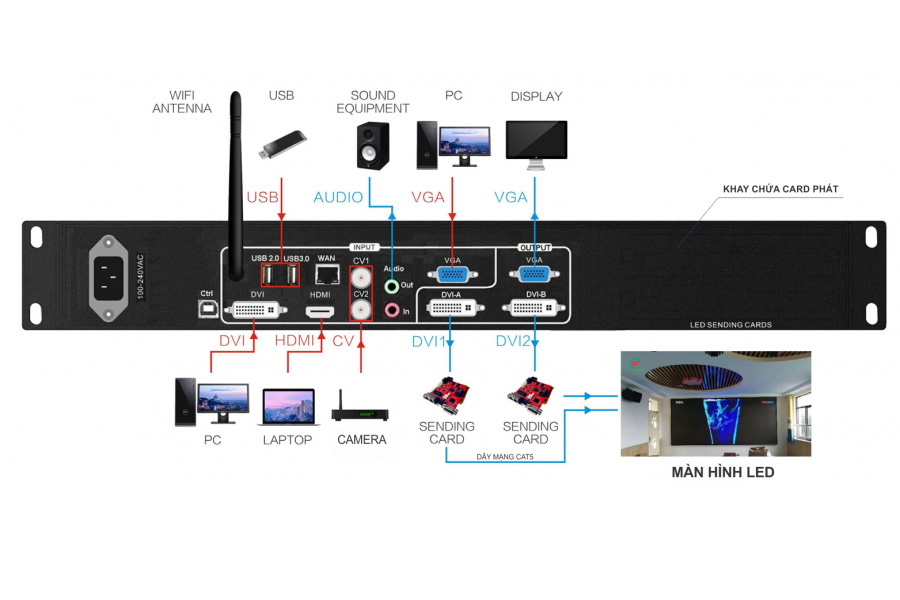
Step 2: Connect the Hardware
- Use the appropriate connection cables between the computer and the LED display controller
- Ensure all devices are properly detected and connected before configuration
Step 3: Configure Display Settings
- Adjust the display resolution according to the actual screen dimensions
- Configure brightness, contrast, and display modes based on project requirements and installation conditions
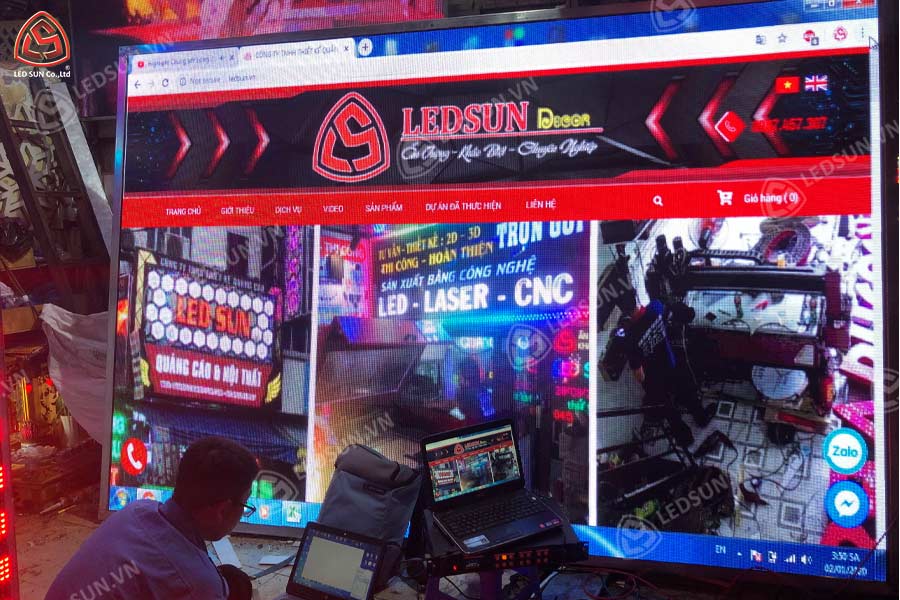
Step 4: Upload Content and Test Display Performance
- Import advertising content, images, or videos into the control software
- Run a test to verify image quality, audio performance (if applicable), and display effects before operation
Các Lưu Ý Quan Trọng Khi Thi Công Lắp Đặt Màn Hình LED
- Đảm bảo an toàn điện: Sử dụng dây cáp, nguồn điện đạt chuẩn.
- Chú ý đến nhiệt độ hoạt động: Cần có hệ thống tản nhiệt tốt, đặc biệt đối với màn hình ngoài trời.
- Kiểm tra góc nhìn: Điều chỉnh độ cao và góc nghiêng phù hợp để hình ảnh hiển thị rõ ràng.
- Bảo trì định kỳ: Giúp kéo dài tuổi thọ và duy trì chất lượng hình ảnh.
- Sử dụng linh kiện chính hãng: Đảm bảo màn hình LED hoạt động bền bỉ và tránh hư hỏng sớm.
Trên đây là các bước hướng dẫn thi công lắp đặt màn hình LED chi tiết cho từng loại màn hình. Việc thực hiện đúng quy trình không chỉ giúp tối ưu chất lượng hiển thị mà còn kéo dài tuổi thọ thiết bị, đảm bảo vận hành ổn định và an toàn. Nếu bạn đang tìm kiếm một đơn vị thi công chuyên nghiệp, LED SUN chính là lựa chọn đáng tin cậy. Với kinh nghiệm lâu năm trong lĩnh vực thi công lắp đặt màn hình LED, chúng tôi cam kết mang đến giải pháp tối ưu, đảm bảo chất lượng và hiệu suất hoạt động tốt nhất. Liên hệ ngay với Led Sun để được tư vấn chi tiết về LED display installation services!
Thông tin liên hệ Led Sun:
- Hotline: 0987457307
- Email: [email protected]
- Địa chỉ văn phòng: 170 Hồ Bá Kiện, Phường 15, Quận 10, TPHCM
- Địa chỉ xưởng sản xuất: 331 Thoại Ngọc Hầu, Hiệp Tân, Tân Phú, TPHCM